|
|

|

|
|||
|
|
|
|
Cart Control Nesting will allow you to control, to some degree, the parts that are nested together on your sheet stock in Router-CIM Automation Suite. Normally if you place parts together in Router-CIM Automation Suite, there is no control over which parts will end up together on a sheet, since yield is the highest concern at that point. This can lead to confusion or lost time as the parts are sorted at the machine, after being cut, so that they can be stacked together with other parts from the same priority.
As an example, if you had parts for 5 different assemblies together in one job, it is entirely possible to have parts from all 5 assemblies on the same sheet. This would cause the workers removing the parts to have 5 stacks (or carts) at the machine so that they can place the parts from the same assemblies together. A more efficient way of performing these tasks might be to limit how many carts (or stacls) can be nested together on the same sheet.
So, if the max number of carts is set to 2, then you can only have parts from 2 carts together on the sheet at one time until one of the two carts is finished, then another cart is added so that there are still only two until one of those carts runs out of parts, then another is substituted, and so on until all the parts from all 5 carts are finished. This way there are no more than two carts to stack at one time, or possibly 3 if you run out of parts for a cart part way through a sheet.
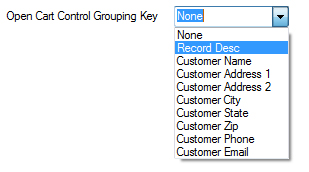
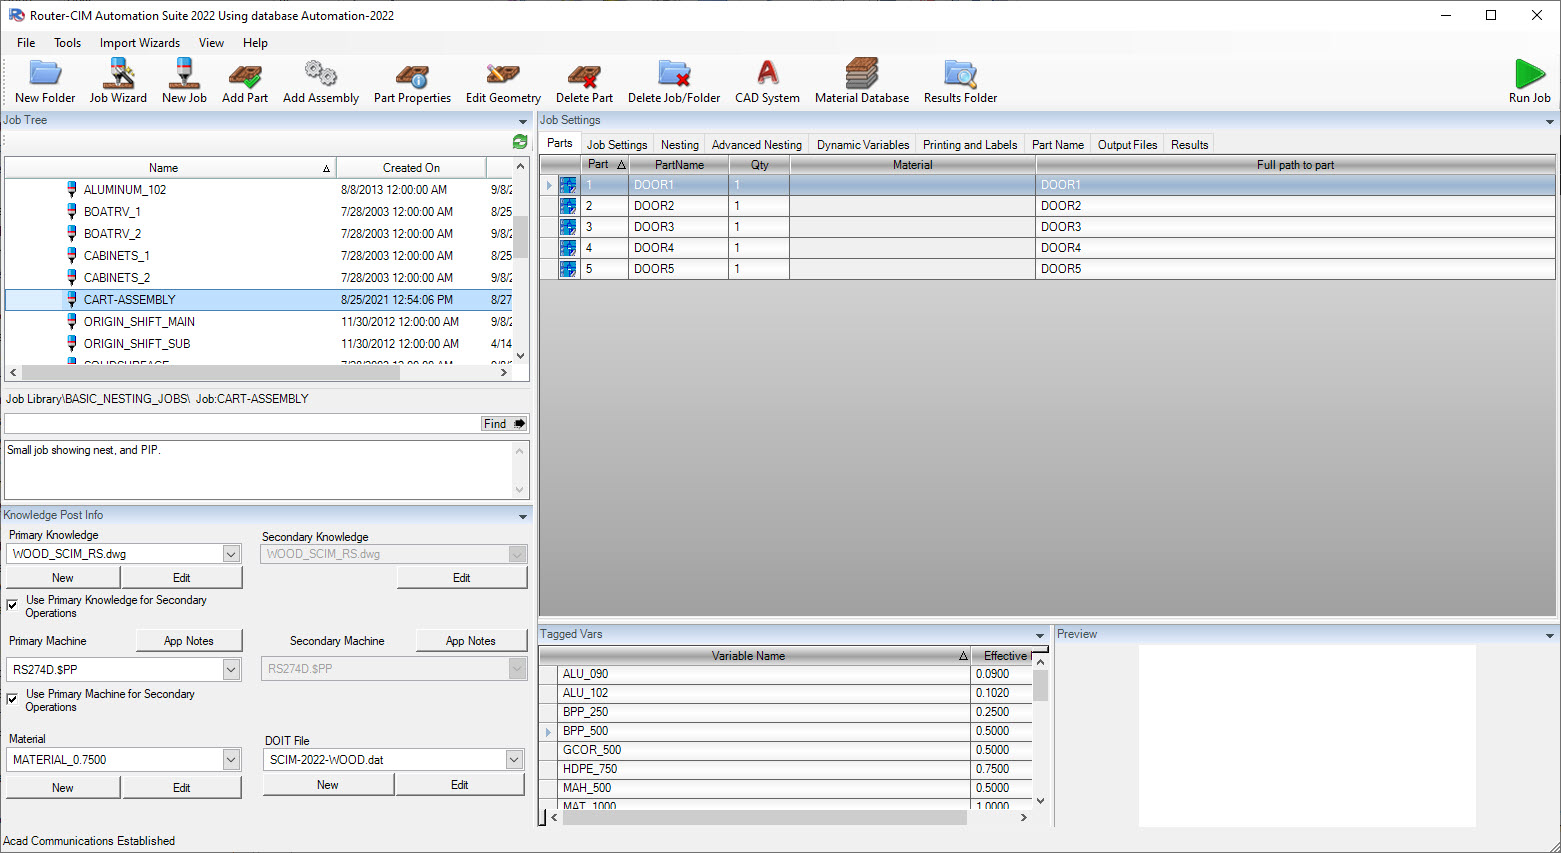
To control this in Router-CIM Automation Suite, you must have the Advanced Nesting option and under the Advanced Nesting tab set what field will be the Open Cart Control Grouping Key in the part parameters.
Open Cart Control Grouping Key
This is the field you can use to set the cart name or number for each part. You can choose from Record Description, or Label Fields 1-8 (Customer Info 1-8 by default).
Whichever key you choose, when adding parts to a job, you will place the cart name or number in the specified field so that the nest program can group the cart parts together.
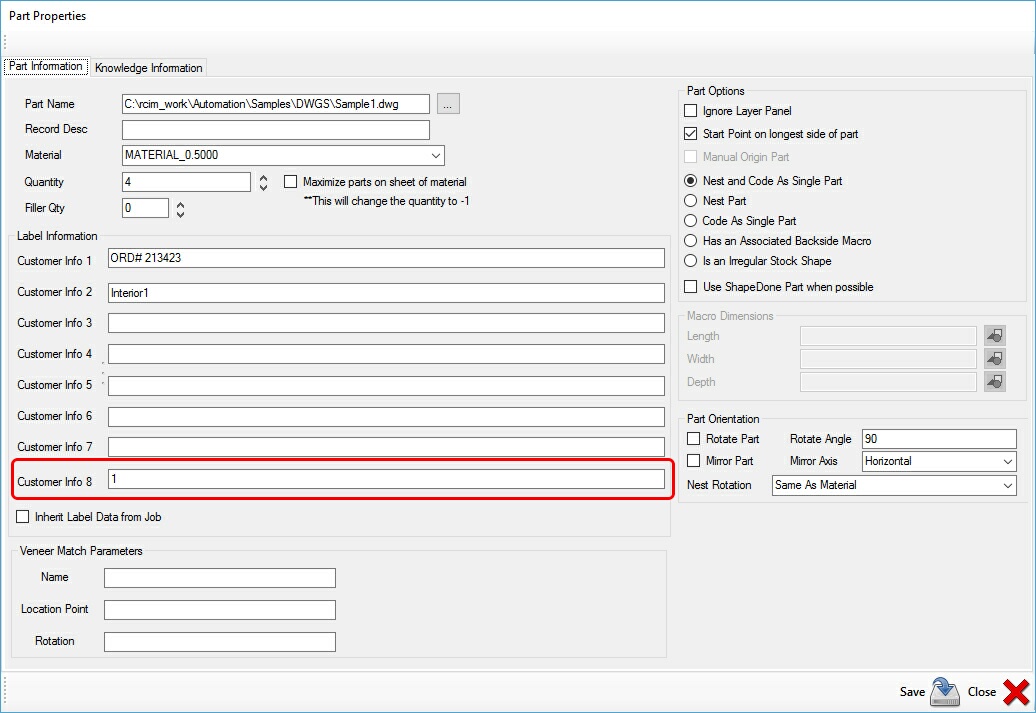
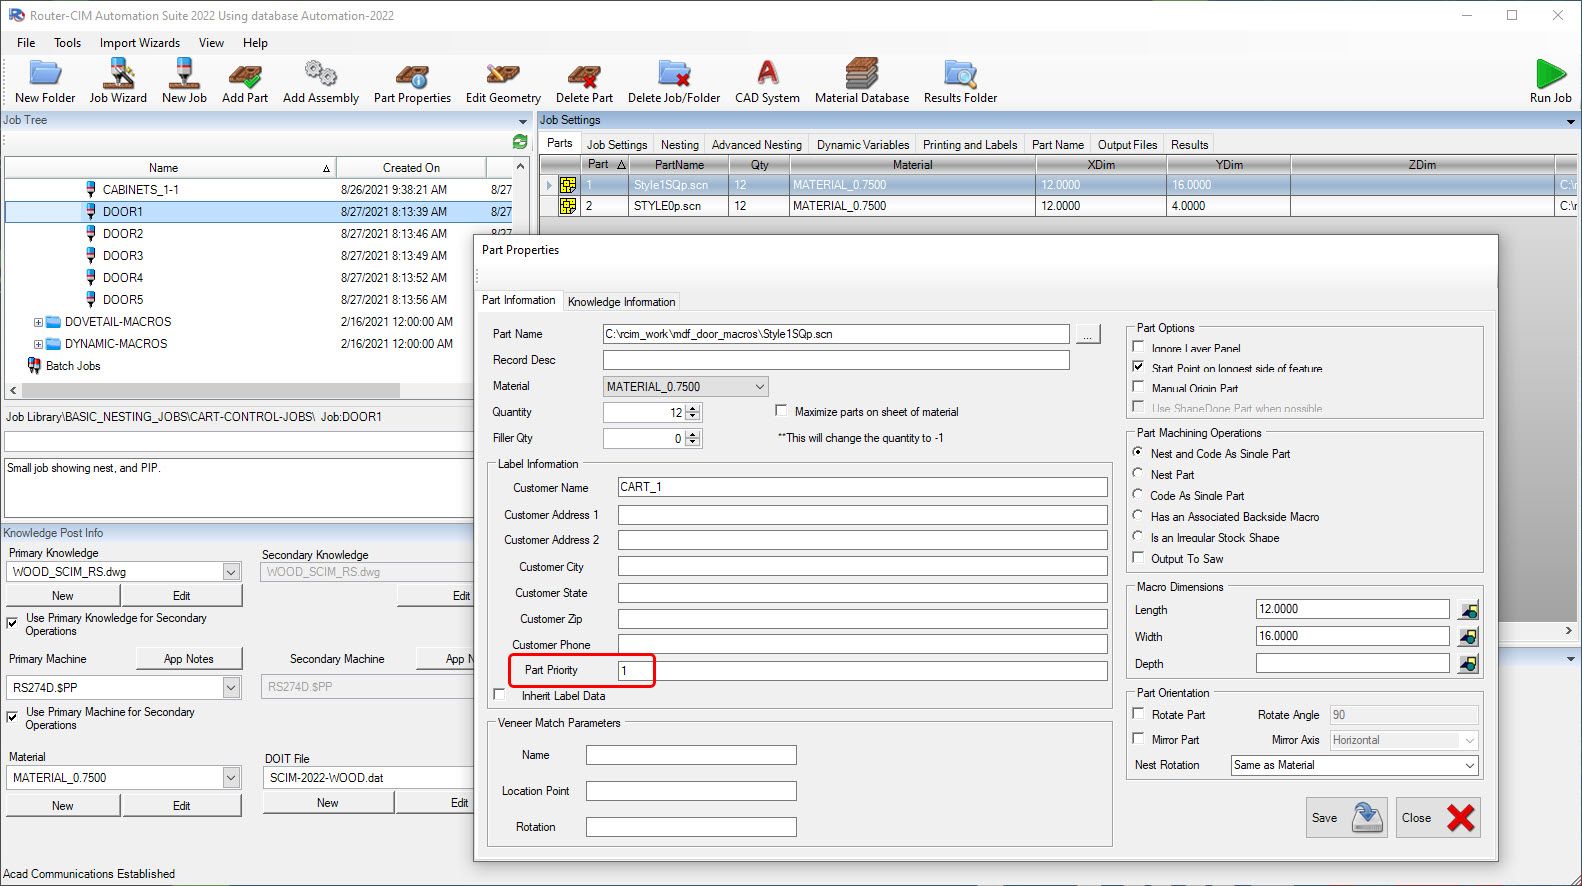
Once this is set, in your job you should set which parts belong to which job (or cart). In the case below, the part is set for Cart 1. You can use any description for the field that identifies the cart, as long as all the parts in the same cart use exactly the same description.
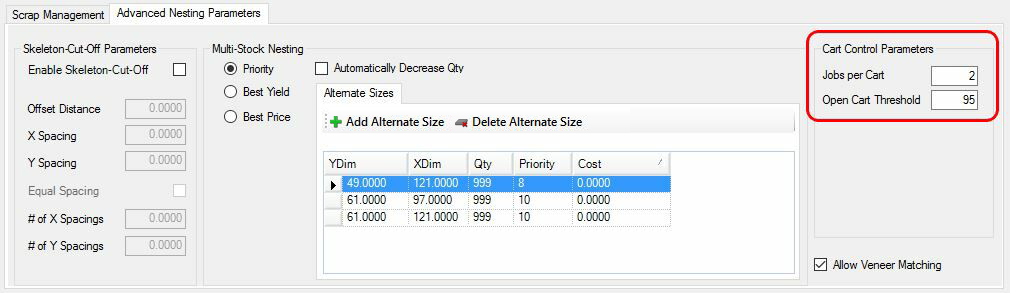
In the material, you can choose the number of Jobs per cart. To locate this option, go to your Material Database and select the material you want to setup for Cart Control. When you open the material, select on the Advanced Nesting Parameters tab and the Cart Control Parameters will be on the right side. This is really the number of groups of parts that have the same record description per sheet in this material. The Open cart threshold is an override that says if there is at least the percentage shown of available space then go ahead and add another group of parts with the same description on this sheet. In this case, only two carts can be on the same sheet because there would have to be 95% of the space (empty sheet) left over in order to add a third cart to the sheet.
This example will use a job that has 10 parts that belong to 5 different carts. The breakdown is like this:

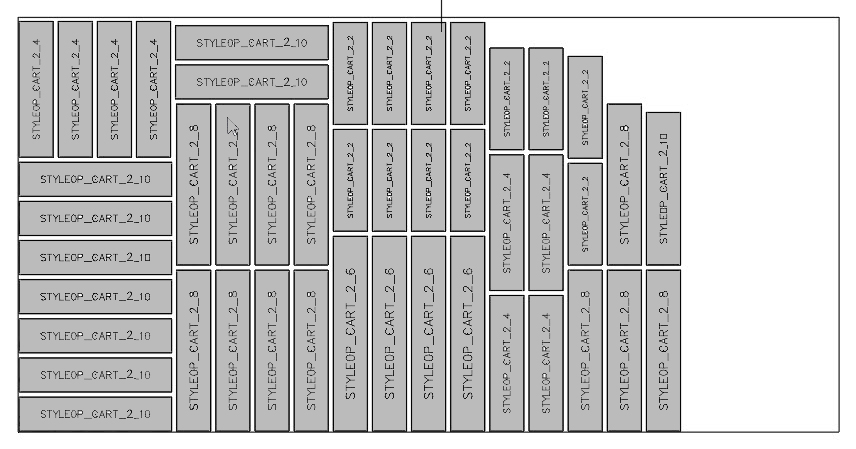
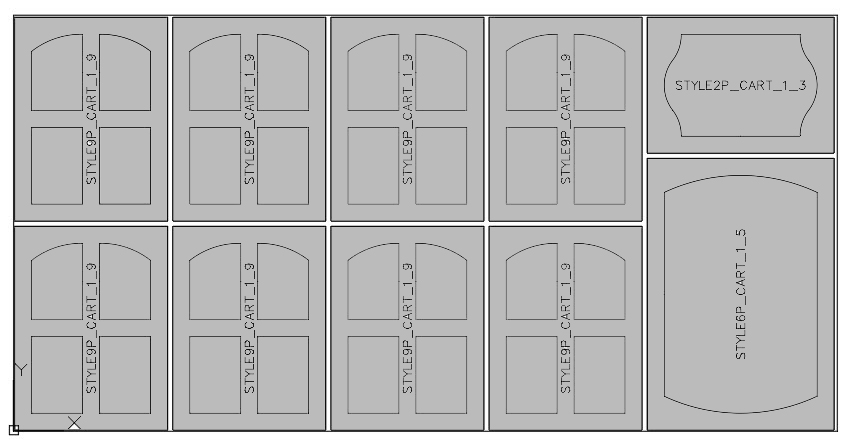
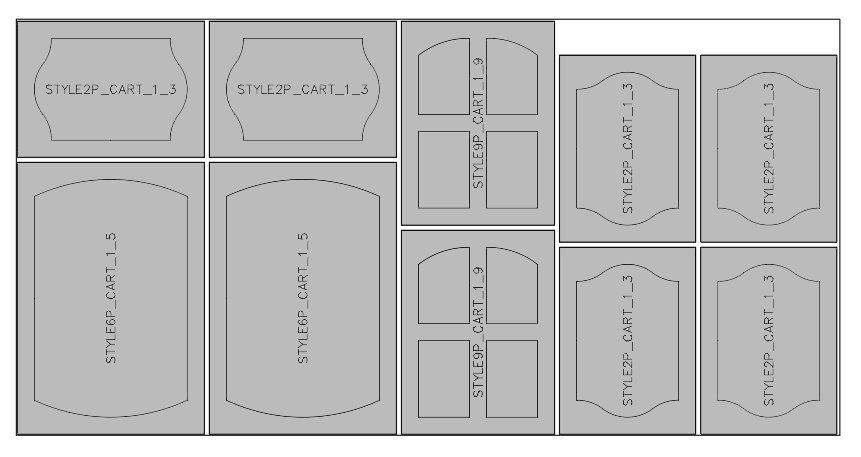
Once this job is nested with the previously set parameters the sheets will look like this:
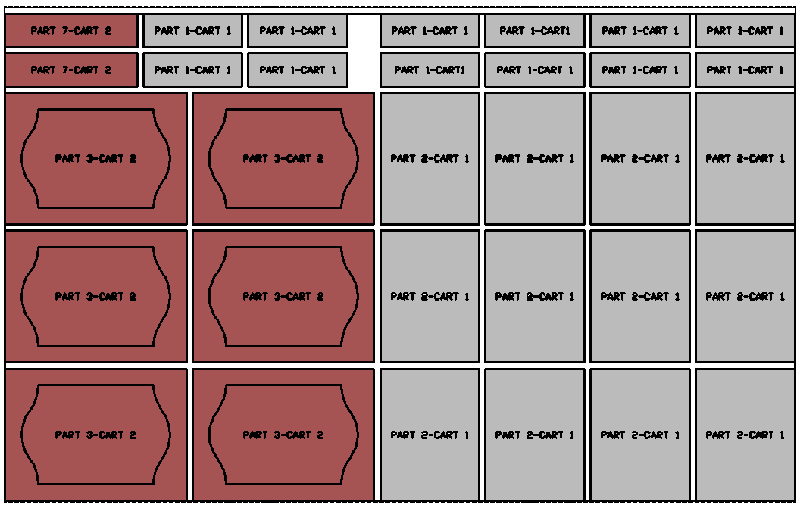
Sheet 1 has parts 1, 2, 3, and 7 which are from Cart 1 and Cart 2. Cart 1 is finished.
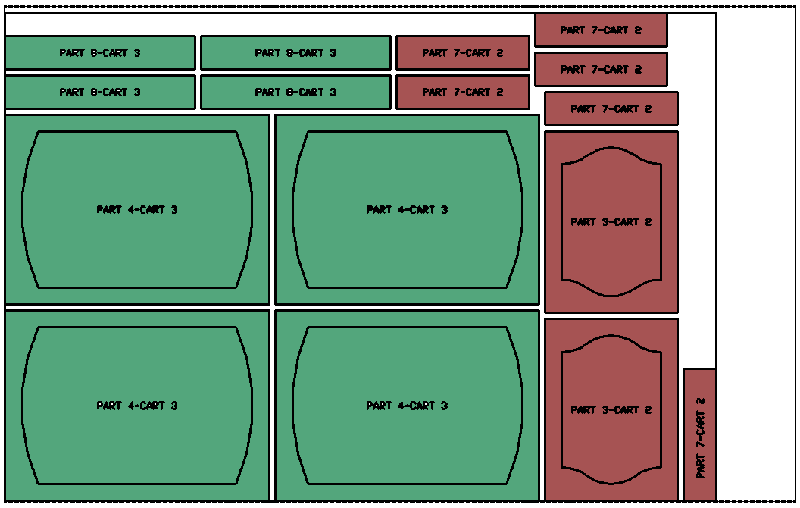
Sheet 2 has parts 3, 4, 7 and 8 which are from Cart 2 and Cart 3. Cart 2 is finished. Cart 3 is also finished.
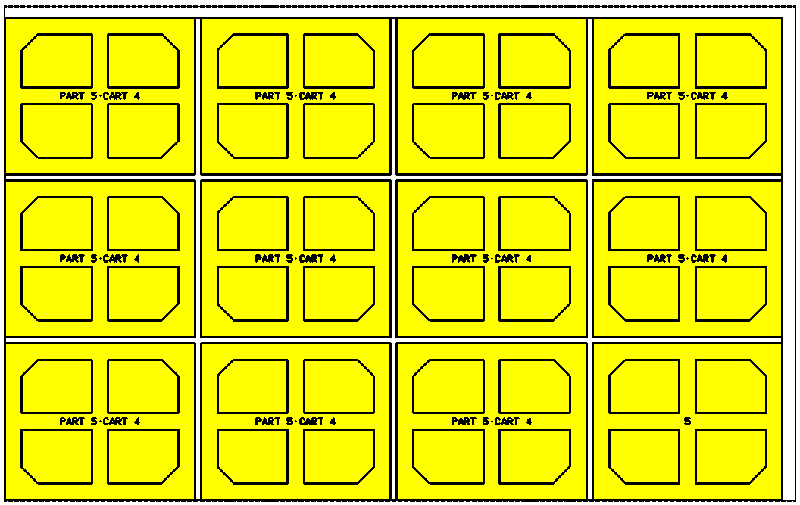
Sheet 3 has part 5 which is from Cart 4 only.
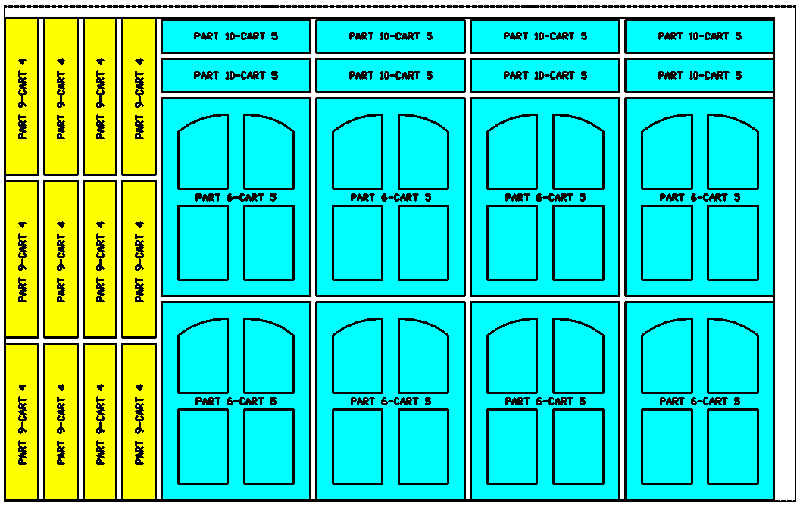
Sheet 4 has parts 6, 9, and 10 which are from Cart 4 and Cart 5. Cart 4 is finished.
Cart Control can also be used in an assembly job. Instead of adding all you parts into a single job, you can add different assemblies to a job. This creates a master job. Cart Control follows the same part priority structure as a standard job. You will need to define the Part Priority as mentioned above on a part level basis. The parts in the assembly jobs will be merged into a large job and the priorities will then be defined. If all the assemblies added to the master job have a part priority that matches, those parts will be nested together.
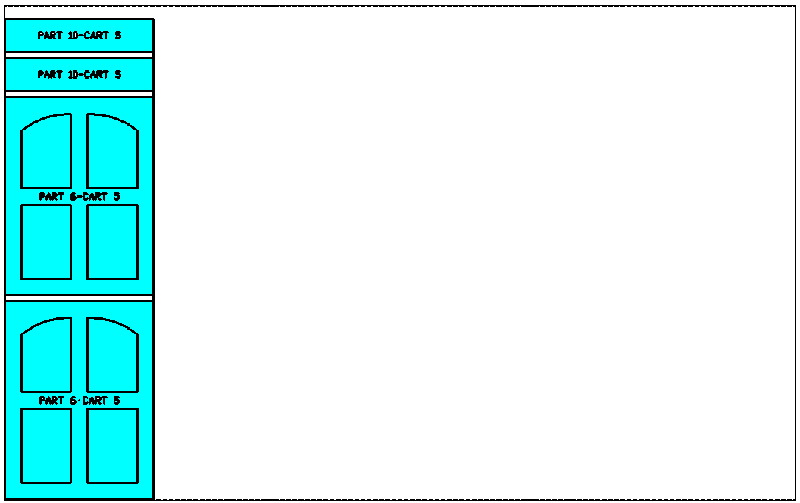
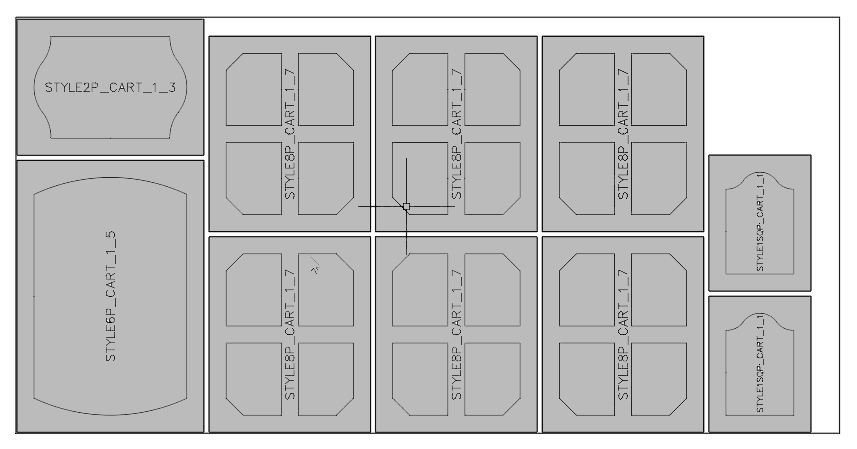
Here is a master job that includes assemblies to be used with Cart Control.
In each assembly that was added, each part has beencart.
The resulting cart control nest is as follows:
Sheet 1 has Cart 1 parts:
Sheet 2 has Cart 1 parts:
Sheet 3 has Cart 1 parts:
Sheet 4 has Cart 1 parts:
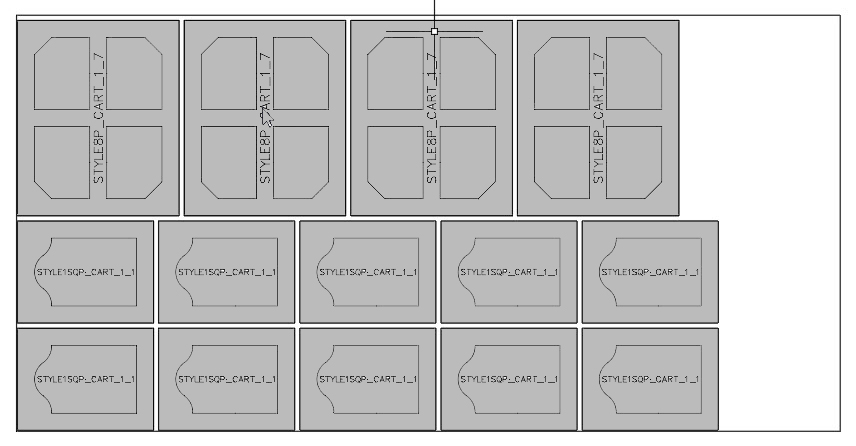
Sheet 5 has Cart 1 parts:
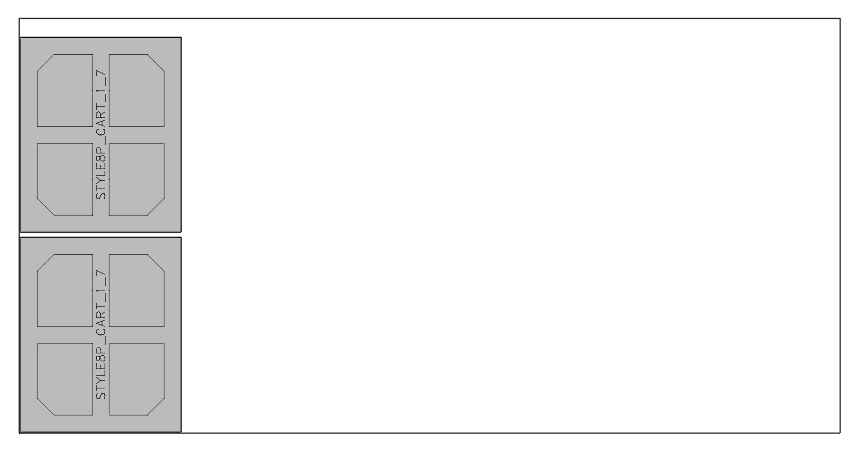
Sheet 6 has Cart 2 parts: